


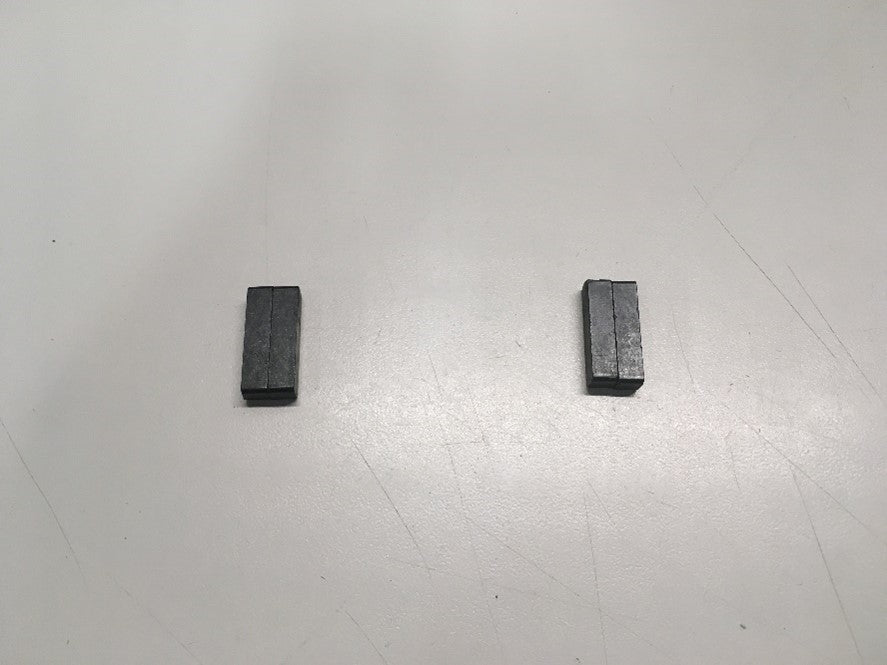
Did you know that there are 2 sets of magnet installed in the globe of your Litter-Robot 3 and each set consists of 2 magnets (a pair)? I didn’t but certainly found out by completely disassembling the globe during a deep clean.
Do note, avoid disassembling the globe without first understanding where these magnets are located and making sure they do not fall out of their pockets. One of my magnets fell out and the time it took me to realise, locate and refit was more than a little frustrating!
In this article, we will examine the globe magnets, their role in the function of your Litter-Robot 3 and how to ensure they are correctly installed.
WHAT DO THEY DO
So, what are these magnets for? In the base behind the control panel of the Litter-Robot 3 are Hall Effect Sensors. When the globe rotates, the magnets pass by these sensors which notify the main circuit board the exact position of the globe.
WHERE THE GLOBE MAGNETS ARE LOCATED
They are located in the gear track that runs around the globe, top to bottom. Facing front of the globe opening, they are located at 1 o'clock and 5 o'clock positions, but are not visible from the front. If you review the back of the track, you will see 4 closed in pockets. 2 of the pockets contain the magnets, with the other 2 empty. You can not see the magnets but can locate them by running another magnet over those positions.


WHY WOULD YOU TAKE THE GLOBE APART ?
There are really only two reasons to take the globe apart, deeper globe cleaining and replacing the globe liner.
Think of the globe as you would the world with its equator separating the north and south around the belly, and the Prime Meridian separating the East and West around the globe track.
When you take the globe apart, you only need to be removing the 8 screws around the equator or belly of the globe. When these 8 screws are removed you end up with the top half (which has the sieve and opening for the waste to fall through) and the bottom half which has the globe liner.
HOW TO INSTALL CORRECTLY
If you have unscrewed along the gear track (the Prime Meridian) and taken apart the globe into 4 quarters or front and rear halves not top and bottom, you may have lost or dislodged the globe magnets, as I did. You will likely not know this until after you have reassembeled the globe and turned on the Litter-Robot and it is flashing a combination of all three of the lights after the start-up cycle completes, although it may appear to be in the correct finishing position (or not).
If you have lost the magnets, you can buy them here.
If you have to refit them, it’s a matter of working out which way up and in, as the magnets work with specific polarity or orientation. NOTE: You can check the poles of the magnets from outside of the globe with the use of any magnet pole detection app on a smartphone (example pictures below) as long as you still have 1 original set in place.


Notice that the poles of each set of magnets are opposite of one another. If you happen to have either set of magnets incorrect then just rotate that set 180 degrees like a key in a lock the pole will flip.
If you have dislodged 1 set only, you can use a separate magnet to help with position using the correct remaining magnet in pocket to orient. Otherwise, you will need to reposition by trial and error until you have it correct (and yes this will involve disassembly and reassembly of the globe, hence my original frustration).
TIP: It can help to think of the magnets like a piece of paper being printed. In Word you can flip on the short edge or the long edge. This is what you will be doing with the magnets when looking for the correct orientation.
PRO TIP: Marking the end and edge of each pair helps (nail polish is good) with keeping record as you are testing for correct position.
IF YOU HAVE OPENED THE MOTORWELL
The Hall Effect Sensor might be out of place. The motorwell should look like this photo with the colour of wires important, and noting the tape over the wires in the channel are very important to stop the black gear wheel catching any of the wires when you refit the cover.
