


The slow flashing cycling light (Bonnet Removed or Cycle Interruption) can be a frustrating error. You have worked through all the troubleshooting (including polishing the bonnet and base connectors) and identified that you need to replace them.
In this article, we will look at how to replace the bonnet and base connectors.
PRO TIP: Do take pictures when you open any of the areas (base/motor well) BEFORE removing anything, to assist with the final install check.
BONNET CONNECTORS
The easier of the two connectors to replace are the bonnet connectors.

To replace these, unscrew the 2 screws on the end of the cover on the left side of the bonnet.

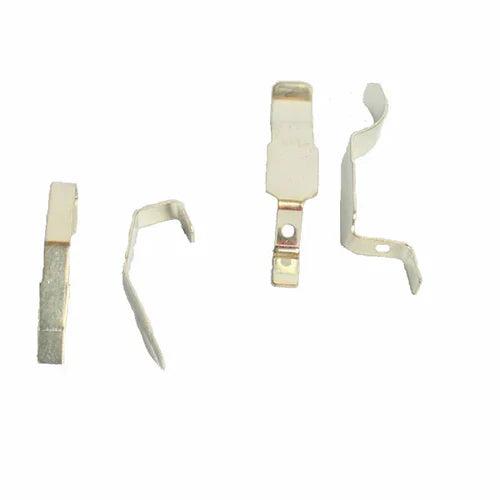
Remove and replace the connectors, keeping the coloured wires in the same location as the order is important. The silver parts pull out of the plug. It's best to hold the plug with pliers or fingers. Do not pull on the wire that extends from the plug. Re-fit and screw the cover back on.

BASE CONNECTORS
Accessing the base connectors requires 9 screws to be removed from the underside of the base, and the base opened into 2 halves. If you have never opened the base into 2 halves this video from the manufacturer and another Australian video on replacing the DFI are helpful for how to open the base.
In the below picture, you will see the top of the base with two metal parts which are the top of the base connectors.

The below picture is when the base is disassembled. When you remove the black and purple wires from the section highlighted, you will be able to wiggle the base connectors out of the base and install the new base connectors.
When you are re-attaching the wires, you must ensure that the black wire is placed on the connector that is closest to the front of the base and the purple wire is placed on the connector closest to the back of the base. Once connected make sure you bend to angle back toward the base.

You are now ready to refit the base together and re-insert screws, firm but not too tightly as the screws are seated in plastic and can be threaded easily.
A general helpful tip:
If in doubt when installing stop, take pics and get in touch, it's easier to ask than to have breakages or frustration!